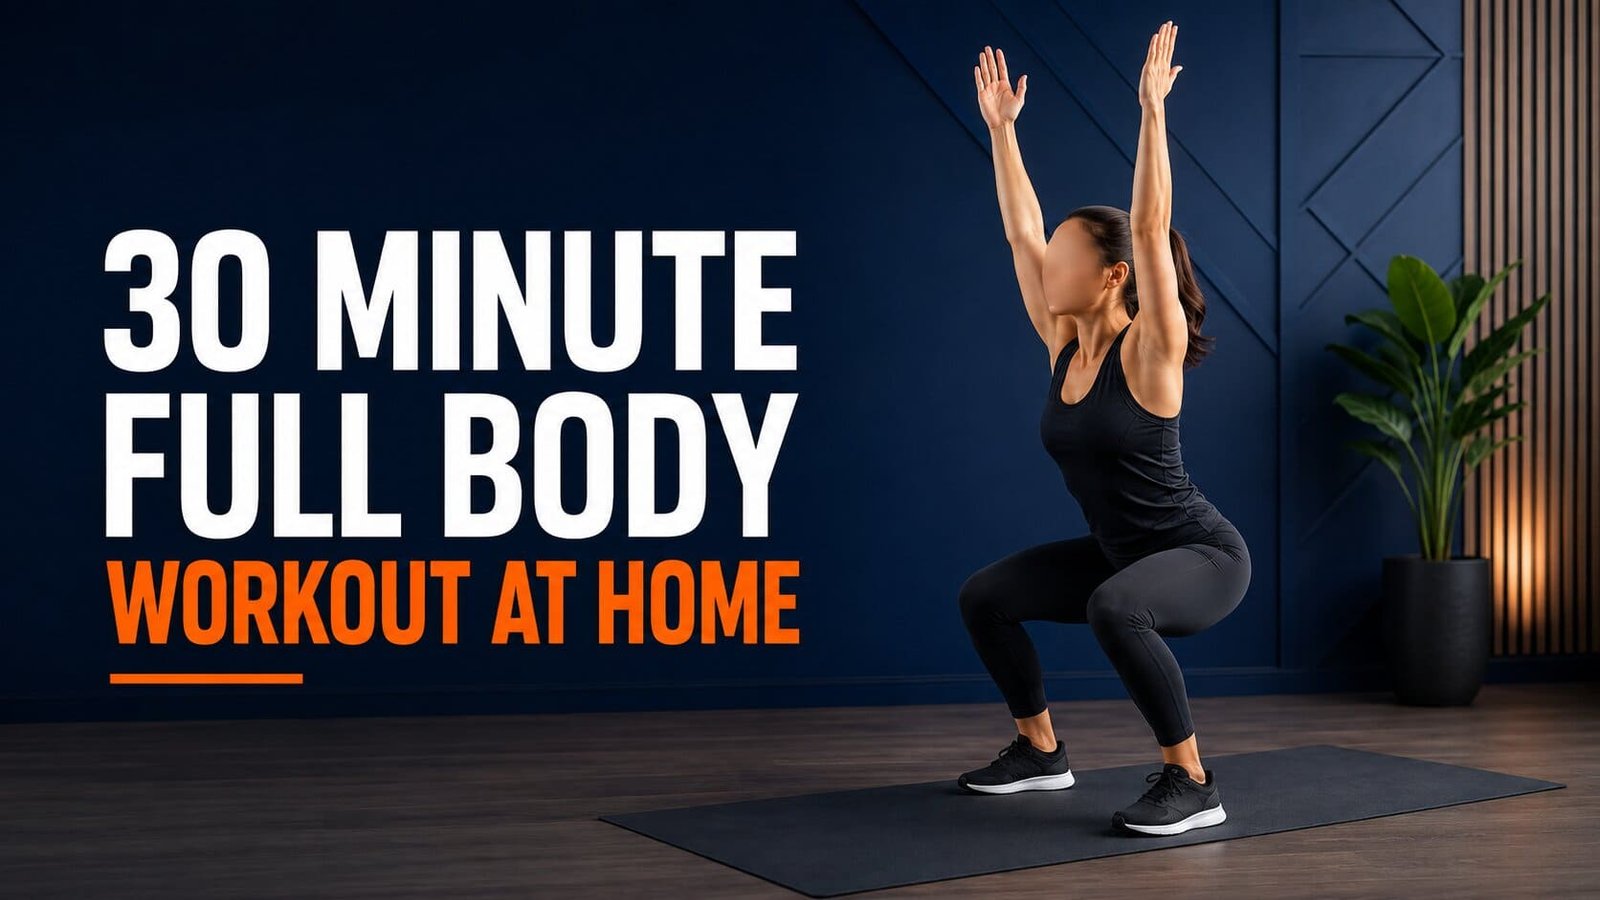
A useful 30-minute full-body workout at home should do more than make you tired. It should train the main movement patterns, fit the promised time, provide clear modifications, and give you a simple way to progress.
The two plans below use the same schedule. The bodyweight version works in a small space and requires no jumping. The loaded version uses dumbbells, but a secure backpack can replace a single dumbbell for several exercises. Both plans emphasize controlled repetitions rather than rushing for a higher calorie burn.
These sessions are general fitness guidance for healthy adults. They are not medical treatment or a personalized rehabilitation plan. If you have an injury, recent surgery, pregnancy-related restrictions, a heart or lung condition, or another concern that affects exercise, ask an appropriate health professional how to modify the routine.
How to Structure a 30-Minute Full-Body Workout at Home
Divide the session into four blocks: a five-minute warm-up, an 18-minute strength circuit, an optional two-minute finisher, and a five-minute cooldown. This makes the routine easy to follow without pretending that warm-up and recovery time do not count.
| Time | Block | Format | Purpose |
|---|---|---|---|
| 0:00-5:00 | Warm-up | Five drills, 60 seconds each | Raise body temperature and practice the session’s movement patterns. |
| 5:00-23:00 | Strength circuit | Six exercises x 40 seconds work + 20 seconds transition; repeat 3 rounds | Train the major muscle groups with controlled repetitions. |
| 23:00-25:00 | Optional finisher | Low-impact march or loaded carry variation | Add brief conditioning without turning the whole workout into rushed cardio. |
| 25:00-30:00 | Cooldown | Easy movement, breathing, and comfortable mobility | Gradually reduce effort and finish with relaxed movement. |
Set a repeating interval timer for 40 seconds of work and 20 seconds to change position. One round takes six minutes, so three rounds take exactly 18 minutes. If you prefer 45 seconds of work, reduce the transition to 15 seconds so the schedule still fits.
How Hard Should the Workout Feel?
Most working intervals should feel challenging but controlled. Choose a variation or load that lets you finish the interval with clean form and leaves roughly two or three good repetitions in reserve.
You do not need to reach muscular failure in every set. The American College of Sports Medicine’s 2026 resistance-training update emphasizes consistency, effort, and individualization; it also reports that failure training and complicated methods are often optional for the average healthy adult.
Five-Minute Dynamic Warm-Up
Use one minute for each drill. Move at an easy pace during the first two minutes, then gradually increase your range of motion. The goal is preparation, not fatigue.
March with arm swings: Stand tall and march in place while swinging the arms naturally. Keep the impact quiet.
Squat to reach: Sit the hips back into a comfortable squat, stand, and reach overhead. Use a chair if needed.
Alternating reverse step and reach: Step one foot back, bend both knees slightly, then return and switch sides.
Hip-hinge drill: Push the hips backward with a long spine, then stand by squeezing the glutes.
Wall or incline plank shoulder tap: Brace the trunk and tap the opposite shoulder without twisting the hips.
Plan A: 30-Minute Full-Body Workout at Home Without Equipment
This quiet, small-space routine uses six repeatable movements. Complete 40 seconds of work, take 20 seconds to change position, and continue to the next exercise. After exercise six, start the next round. Complete three rounds.
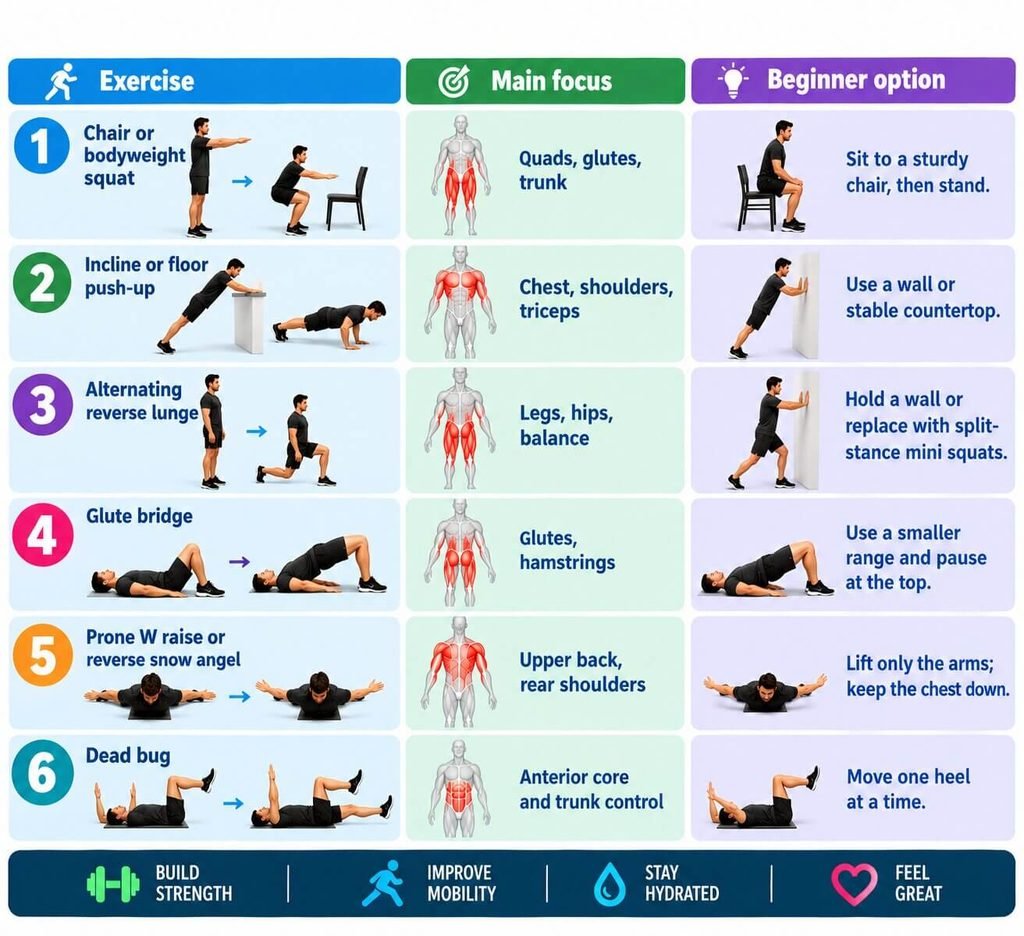
Optional Two-Minute Finisher
March briskly in place for two minutes. Keep it low impact and use a pace that still allows a short sentence. Skip the finisher if your form deteriorated during the circuit or if you are returning after a long break.
| Important limitation: A prone W raise or reverse snow angel can train the upper-back and shoulder-blade muscles, but it does not provide the same progressive resistance as a row. For balanced long-term strength, add a band row, dumbbell row, or another safely loaded pulling exercise when possible. |
Plan B: 30-Minute Dumbbell Full-Body Workout at Home
Use this version when you have one or two dumbbells. A sturdy backpack filled evenly with books can work for the squat, Romanian deadlift, and row, but inspect the straps and closures first. Use the same 40-seconds-on, 20-seconds-to-transition format for three rounds.
| # | Exercise | Main focus | Beginner option |
| 1 | Goblet squat | Quads, glutes, trunk | Squat to a chair or hold no weight. |
| 2 | Dumbbell floor press | Chest, shoulders, triceps | Use one weight held with both hands or press one arm at a time. |
| 3 | Romanian deadlift | Hamstrings, glutes, back isometrics | Use a short range while learning the hip hinge. |
| 4 | Bent-over row | Upper back, lats, biceps | Support one hand on a sturdy chair and row one side at a time. |
| 5 | Standing overhead press | Shoulders, triceps, trunk | Use one weight or a half-kneeling position. |
| 6 | Dead bug | Core stability | Use bodyweight; add a light overhead hold only after mastering the pattern. |
Optional Two-Minute Loaded Finisher
Hold one dumbbell at your side and march in place for 60 seconds, then switch sides for 60 seconds. Keep the torso tall and resist leaning toward or away from the weight. Use an unloaded march if your grip or posture fails.
How to Choose the Right Dumbbell Weight
Use different weights when the exercises demand it. Your squat and deadlift will usually tolerate more load than your overhead press. A single “perfect” dumbbell weight for every movement rarely exists.
Start light enough to learn the motion. During the last 10 seconds, the exercise should feel harder, but you should still control the lowering phase and keep the same range of motion. If you rush, shorten the range, hold your breath excessively, or lose alignment, reduce the load or use the beginner option.
Exercise Instructions, Form Cues, and Modifications
Use the cues below as simple checkpoints. Individual anatomy differs, so a comfortable stance and range may not look identical for every person. Muscle effort is expected; sharp pain, joint pain that worsens with each repetition, dizziness, or unusual shortness of breath is a reason to stop.
Squat
Stand with the feet around hip-to-shoulder-width apart. Brace gently, sit the hips down and back, and keep the knees tracking in the same general direction as the toes. Drive through the whole foot to stand.
Modification and progression: Use a chair target. Progress by removing the chair, slowing the lowering phase, or adding load.
Push-up or Floor Press
For push-ups, keep the body in a straight line from head to heels or knees and lower the chest between the hands. For floor presses, keep the wrists stacked over the elbows and lower until the upper arms lightly contact the floor.
Modification and progression: Raise the hands to a wall or counter for push-ups. For pressing, use a lighter load or one arm at a time.
Reverse Lunge
Step back far enough that both knees can bend comfortably. Keep most of the pressure through the front foot and return by pushing the floor away.
Modification and progression: Hold a wall, shorten the step, or use a split stance without stepping between repetitions.
Glute Bridge
Lie on your back with the knees bent. Brace the trunk, press through the feet, and lift the hips without overextending the low back.
Modification and progression: Reduce the height. Progress with a pause, slower tempo, or single-leg-assisted version.
Romanian Deadlift
Hold the weight close to the legs. Soften the knees, move the hips backward, and stop when the hamstrings feel loaded or the back can no longer stay controlled. Stand by driving the hips forward.
Modification and progression: Practice against a wall: stand several inches in front of it and reach the hips back to touch it.
Bent-Over Row
Hinge at the hips, brace the trunk, and pull the elbows toward the back pockets. Avoid shrugging or rotating to lift the weight.
Modification and progression: Use one arm with the opposite hand supported on a sturdy surface.
Overhead Press
Start with the hands near shoulder height. Brace the abdomen and press without leaning back. Finish with the weight stacked over the shoulder.
Modification and progression: Press one side at a time, use a lighter weight, or stop short of overhead if that range is not comfortable.
Dead Bug
Lie on your back with the hips and knees bent. Exhale gently, keep the ribs controlled, and slowly lower the opposite arm and leg without arching the low back.
Modification and progression: Tap one heel to the floor at a time. Progress by extending the leg farther or slowing each repetition.
Five-Minute Cooldown
A cooldown does not need to be complicated. Use easy movement and comfortable ranges while your breathing settles. Do not force a deep stretch into pain.
One minute: slow march and relaxed arm swings.
One minute: standing or half-kneeling hip-flexor stretch, 30 seconds per side.
One minute: supported hamstring hinge, 30 seconds per side.
One minute: doorway or wall chest stretch, 30 seconds per side.
One minute: slow nasal breathing or any comfortable breathing pattern while lying or sitting.
How Often Should You Do This Workout?
Most beginners can use this routine two or three times per week on nonconsecutive days. Start with two sessions if you are new, noticeably sore, or also doing other demanding exercise. Add a third session only when you recover well and can maintain good form.
The U.S. Physical Activity Guidelines recommend muscle-strengthening activity involving all major muscle groups on at least two days per week. ACSM’s 2026 update likewise emphasizes training the major muscle groups at least twice weekly and notes that home-based bodyweight, band, and resistance routines can improve strength and physical function.